How to schedule an ad
- Help Center

- Dec 1, 2022
- 4 min read
Updated: Jun 13, 2024
Index:
Reminder: updating the Day Parting, Days of the Week, and Selecting Screens will change how the frequency works. If you have a creative scheduled for only Mondays while the rest of your creatives are on all days of the week that one creative will run less since it can only run on one day.
You want to schedule an Ad and you know what campaign it is in
Make sure you are using the account you would like to schedule an ad for by clicking on the account switcher on the top right of the screen and selecting the correct account.
From this home page, you can select the campaign you wish to schedule from.
You will now see a list of ads. Find the ad you wish to set a schedule for and click on the calendar icon or the billboard icon to the right of the photo. (You can also use the filter bar to find the Ad)
From the calendar icon you will be able to set Start and Stop dates, limit the times of the day for an ad, or select specific days of the week for an ad to play.
From the billboard icon you will be able to schedule the ad on one or multiple screens from your campaign. It is defaulted to be shown on all of your screens.
Notice if a calendar/billboard icon is the teal color, it is because it has a schedule. Click on the icon to see what days/screens it has scheduled.
Notice if the title of the ad is grey, it is being skipped for some reason (is the schedule set for a different day/time than now?)
You might have to refresh the page to see the different colors.
You want to schedule an Ad that you just posted
You just clicked the post ad button and selected a photo.
Scroll down to Campaigns and click on the calendar icon or the billboard icon.
From the calendar icon you will be able to set Start and Stop dates, limit the times of the day for an ad, or select specific days of the week for an ad to play.
From the billboard icon you will be able to schedule the ad on one or multiple screens from your campaign. It is defaulted to be shown on all of your screens.
Notice if a calendar/billboard icon is the teal color, it is because it has a schedule. Click on the icon to see what days/screens it has scheduled.
Notice if the title of the ad is grey, it is being skipped for some reason (is the schedule set for a different day/time than now?)
You might have to refresh the page to see the different colors.
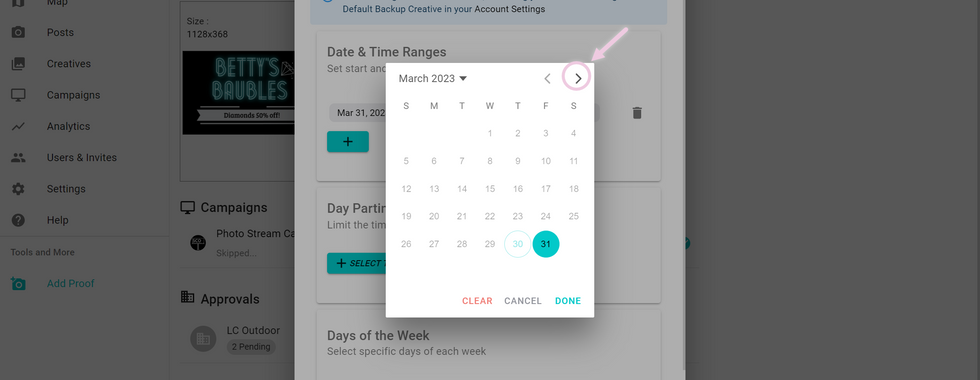
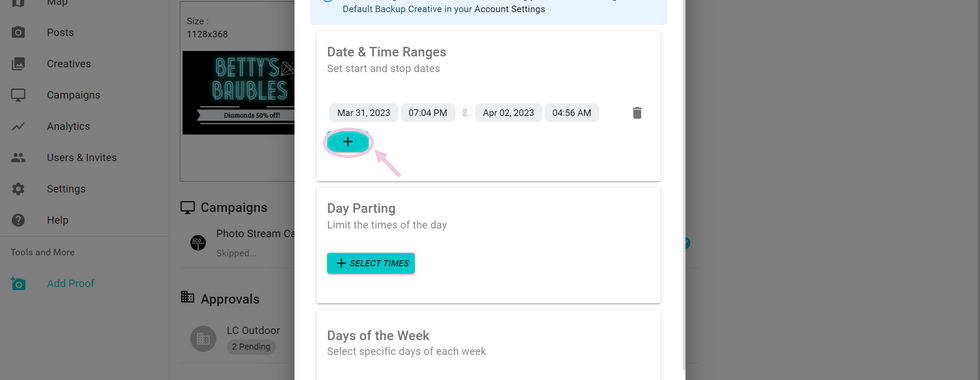
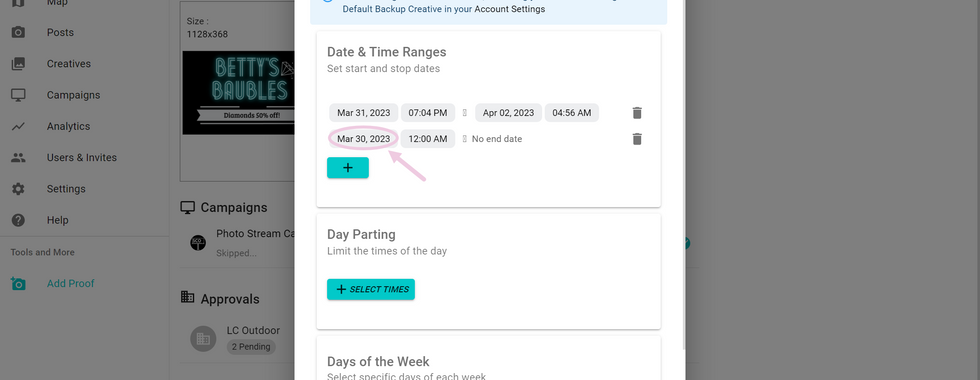
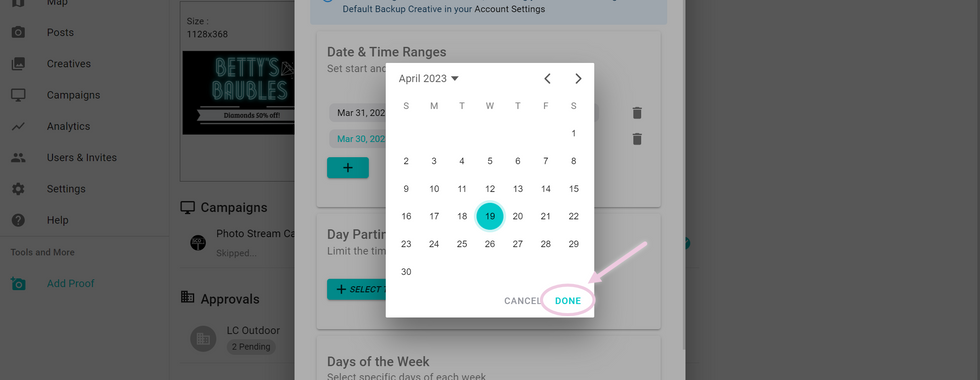
Date and Time Ranges
Set start and stop dates.
After clicking on the calendar icon...
You can click add dates to add a range.
Clicking on "no end date" will allow you to add an end date.
Clicking the plus icon will allow you to add more dates.
Set it to run for a single day, multiple days, as many dates or date ranges as you’d like. Don’t forget to click Save once you have the schedule the way you want it. Just know that if you set dates for a creative to run that it will run ONLY on those dates.


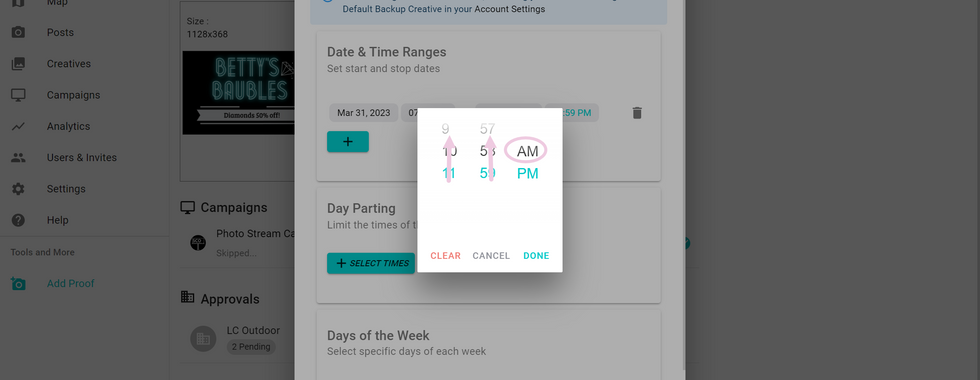


Day Parting
Limit the times of the day.
After clicking on the calendar icon...
You can click select times to change when this ad will show.
Use the slider to choose your start time and end time.
Clicking the plus icon will allow you to add more ranges.
Set it to run for an hour, multiple hours, or even only at night. Add as many time ranges as you'd like. Just know that if you set any times for this creative to run then it will ONLY run at those times.


Days of the week
Select specific days of each week.
After clicking on the calendar icon...
You can click set days of the week to choose which days you want the ad to run.
You will automatically be set for every day, but you can uncheck any days that you don't want the ad to run.
Have the ad run Tuesday and Thursday, or on the weekend. Just know that if you set any times for this creative to run then it will ONLY run at those times.


Item Screen Select
After clicking the billboard icon...
You can select between running your ad on all campaign screens or selecting specific campaign screens.
If you wish to select specific campaign screens, you can click that button, and then select which screens you want the ad to run on by selecting them via the interactive map or by selecting them out of the list on the left side of the screen.
When you are done, you can click save.


