Your First Lucit Application
- Developer Support

- Jan 16, 2024
- 5 min read
Updated: Jan 19, 2024
A comprehensive guide to building your first "Hello World" application.
You can create as many apps as you wish in Lucit. For this guide, we are creating a simple app that does nothing more than provide connectivity to the API
By following this guide, you will
Create a new App in Lucit
Assign Capabilities and Permissions
Create an Authentication Token and Secret
Download and Install the lucit-cli command line tool
Test your Lucit API connection (see Lucit API Docs)
Add your app to an account in Lucit
Sign In to Lucit and Switch to your Personal Profile
If you have not yet signed up for Lucit, please do so in order to continue
In Lucit, switch to your Personal Profile in order to get started.
In the left hand menu , you should see a link for "Apps" If you don't see "Apps", you will need to first enable developer mode in your Settings.

Enable Developer Mode
To Enable Developer mode, click on Settings, scroll to the Developers panel, and enable "Developer Mode"
Create your App
In the left side menu, click on Apps

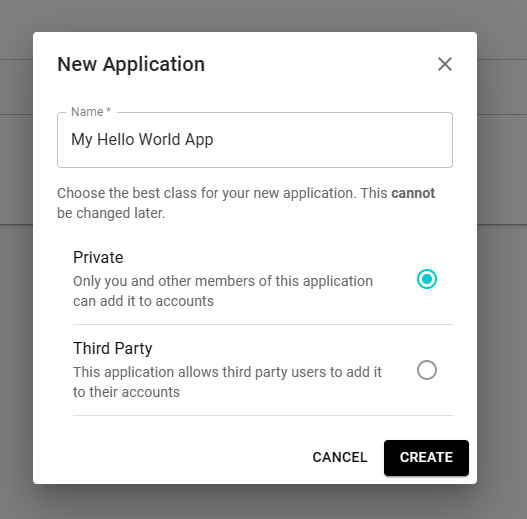
Click the NEW APPLICATION button
Give your app a name, for instance My Hello World App, select Private for your application class and click CREATE
You will be then greeted with your app settings page.
Let's tidy a few things up and make this app look good
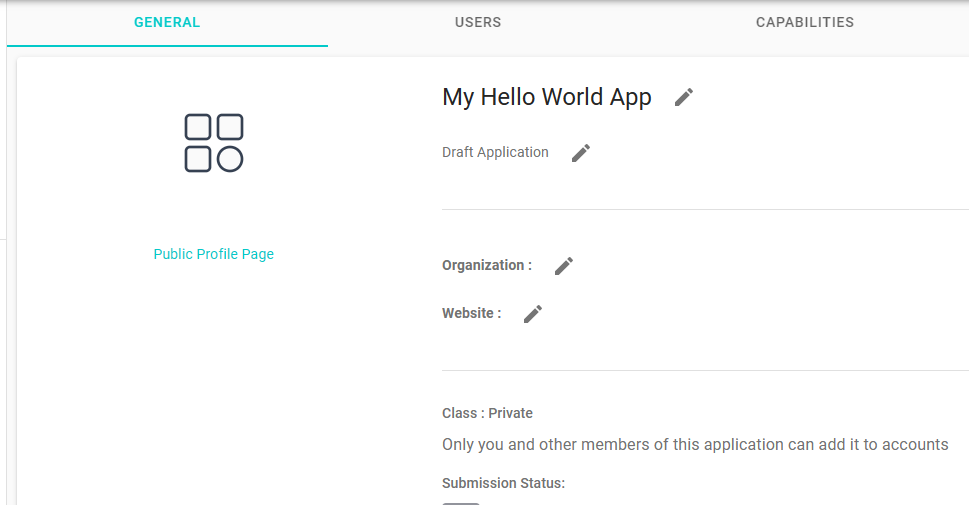
Give it a Logo
Cick on the empty logo spot to choose an image for your logo


Edit your App Description
If you are creating a Third-Party app that you are going to make available to anyone, put a good description here
Click the Pencil Icon next to your description field

If you wish, you can add an Organization Name and a Website
This is not required for Private Apps, but, Public, Third-Party apps will be rejected without these fields

Your Application ID
To find your Application ID, scroll down to this section

Your Application ID is very important, and, when sending requests to the Lucit API, you will have to provide your Application ID in a special request header called AppIdV3 - See Authenticating Requests for more info
Users
The Users Panel is a list of people who can administer this app. Currently, the only person in this list is you, however, if you wish to invite people within your organization to be able to manage the settings for this app, you can invite them here

Add Capabilities
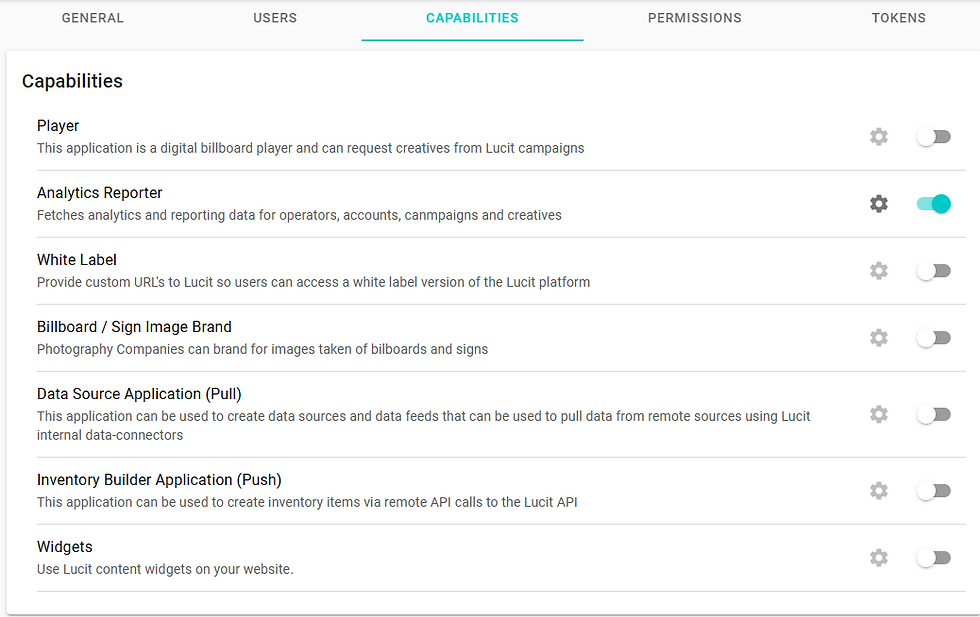
Application Capabilities describe, in a general sense, the functionality of your app and what it is for.
Click on the CAPABILITIES tab
Every app must have at least one Capability selected, and it is important to only select capabilities that your app will be using.
We do strongly recommend a "one app per capability" strategy, however, there may be cases when you need to have more than one capability in a single app
For the purposes of this Hello World app, let's select "Analytics Reporter" as your capability
Choose Permissions
Every Lucit app must enumerate the permissions that it will need to have when accessing data.
Click on the PERMISSIONS tab
When you are viewing the Lucit API Docs for each endpoint, endpoints that require specific permissions will indicate as such for each endpoint
Here is an example for the accounts POST endpoint

These permissions are presented to users when they add your app and they must agree to authorize these permissions
After you app moves from Draft to Active, these permissions cannot change.
For our sample app, let's just choose the following:
viewAnalytics
viewContent
view
viewCampaigns

When trying to determine which permissions to select, review the endpoints that you wish to access. The documentation will indicate what (if any) permissions are required to use that endpoint
For instance the accounts/{id}/campaigns endpoint shows the following

Create an Authentication Token and Secret
Finally, let's create an Authentication Token that we will use to make our API calls
Click on the TOKENS tab and click NEW TOKEN
Be sure to choose Authentication Token and then click CREATE
Important : Copy your token and secret - You will need them for the next step

You can learn more about Lucit Tokens Here
Now that everything is setup, we can start making requests to the Lucit API using your new application.
For this example, we will use the lucit-cli command line application that makes it easy to setup and make requests
Install lucit-cli
The lucit-cli app is an open source application that can be installed from https://github.com/lucit-cc/lucit-cli
It can be installed on Windows, Linux and MacOS - Note that you will need to have both git and go installed ahead of time
Please follow the README at https://github.com/lucit-cc/lucit-cli for installing the lucit-cli app
Remember: You will need your Application ID, Token and Secret.
When initializing the luci-cli command line app, these 3 items will be requested during the init process
Test your app from the CLI
If you have followed the README for the lucit-cli application, and have completed the step running go install you should now have the lucit-cli command available in your command prompt
Test this by running
lucit-cli testIf it outputs the name of your app, then, it is working correctly

Now, with the lucit-cli get command, you can make calls to various endpoints
At this point, most requests won't return anything, because you app has not been authorized by any Accounts (or Agencies)
We will do that in the next step
To confirm this, run
lucit-cli get /accountsYou should have an empty data set

Create a new account and add your app to it
Now we will create an account, and some objects to go with it that we can then see results from using the API
First, in Lucit, go to the Home screen, and click Add Account (or create your account)
You can follow the guide at this help doc if you have trouble
Let's call this account My First Account and select Retail for the account type

After adding the account, note that it switches you to the profile of your new account

Now, let's create a new campaign (Learn more about setting up campaigns here)
From the Drop-Down, choose "Breezy Billboards" - This is a fictional media owner that we can use for this test
Select both screens and click NEXT


It will ask you to choose your first creative - Upload any image (doesn't matter what)
Our user, Duff, uploaded this

Now we have an account, a campaign and a creative.
Let's add our App do this account and see if we can make requests!
In the left side menu, click on Settings

Scroll down to Apps & Data Sources

Click on ADD NEW
Search for the app your created (For example, search for "Hello World" if that is what you named your app)

Your app appears here, only because you created it. At this time, nobody else has access to it because it is a private app, and you are the only user of it
Click on the app to add it and you should receive a confirmation message that it was added.

Make requests to the Lucit API for your new account
Ok, back to the command line, let's make some requests!
Account List
You should now be able to see your account in your account list
lucit-cli get /accounts
Copy the lcuid id for your account. We will use it to make a few more requests
Account Campaign List
lucit-cli get /accounts/{lcuid}/campaigns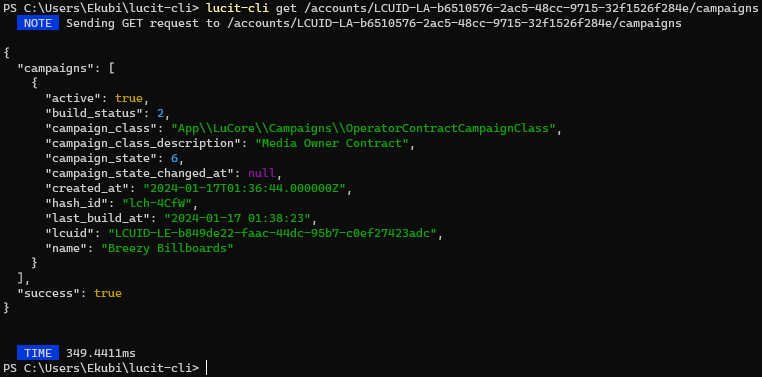
Inventory Items List
Inventory items are containers for data and creatives
See the inventory item you created earlier when you uploaded your first creative
lucit-cli get /accounts/{lcuid}/inventory-items
You can play around with any of the endpoints by reading the complete API documentation at https://apidocs.lucit.app/
Conclusion
You just built your first Lucit App!
Visit the Lucit Developers center for more information, ideas and examples


